
Table of Contents
- What Is Whipped Soap?
- Which Soap Bases Can Be Used for Whipped Soap?
- Equipment You’ll Need
- Step 1: Weigh and Cut the Soap Base
- Step 2: Whip the Soap Base
- Step 3: Prepare Fragrance, Colour, and Additives
- Step 4: Add Fragrance, Colour, and Additives
- Step 5: Whip Until Light and Fluffy
- Step 6: Colour Splitting for Multi-Coloured Designs (Optional)
- Step 7: Pipe or Spoon Into Containers
- Setting, Storage, and Shelf Life
- Gifting and Selling Considerations
- Final Thoughts
- Disclaimer
- FAQs
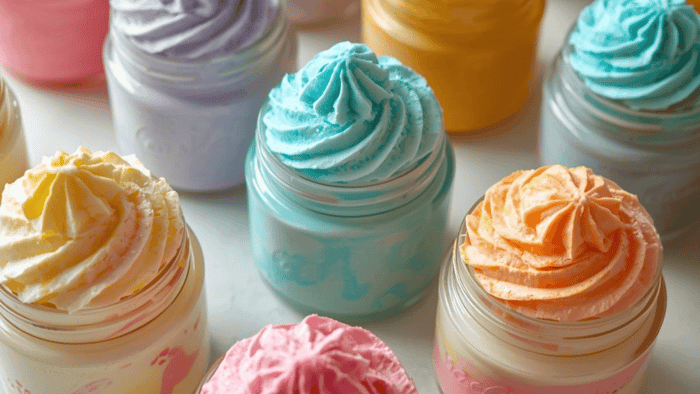
Whipped soap has become a firm favourite in handmade bath and body care — and for good reason. With its soft, cloud-like texture and luxurious feel, it turns everyday cleansing into something a little more indulgent. If you’ve ever wondered How to Make Whipped Soap, this guide will walk you through the process step by step, using safe, whippable melt and pour soap bases and clear, practical instructions.
This tutorial is designed for beginners and experienced makers alike. It explains not only how to make whipped soap, but why each step matters, helping you achieve consistently light, fluffy results whether you’re crafting for personal use, gifting, or selling.
What Is Whipped Soap?
Whipped soap is a solid soap base that has been mechanically aerated using a stand mixer or electric hand whisk. Instead of melting the base, air is beaten into it, creating a soft, mousse-like texture similar to whipped cream or buttercream frosting.
One important point when learning How to Make Whipped Soap is understanding that this method works specifically with opaque melt and pour soap bases. These bases have already gone through saponification, meaning no lye is involved, making the process far safer and more accessible than traditional soap-making methods.
Which Soap Bases Can Be Used for Whipped Soap?
Although Crystal OPC (Opaque Crystal) soap base is widely used, it is not the only suitable option. Several opaque melt and pour bases are fully whippable and produce excellent results when used correctly.
Whippable Soap Bases
You can successfully make whipped soap using:
Opaque Crystal (OPC) Soap Base
A classic choice that whips easily and holds its shape well.Suspending Melt & Pour Soap Base
Slightly softer than OPC, but excellent for whipped soap, especially if you plan to add exfoliants or botanicals.Shea Butter Melt & Pour Soap Base
Creates a richer, denser whipped texture with added skin-conditioning benefits.Goat’s Milk Melt & Pour Soap Base
Whips into a creamy consistency and is ideal for gentle or sensitive-skin products.Aloe Vera Melt & Pour Soap Base
Produces a lighter whipped texture with a soothing skin feel, perfect for fresh or summer-style formulations.
All of the above are opaque melt and pour bases, which is the key requirement when learning How to Make Whipped Soap. Clear or transparent soap bases are not recommended, as they are too elastic and do not retain air effectively.
Equipment You’ll Need
Before starting, ensure your workspace and tools are clean and dry. You’ll need:
A whippable opaque melt & pour soap base
Stand mixer or electric hand whisk
Mixing bowl
Digital scales
Spatula
Small bowls for colourants and additives
Piping bag and large nozzle (optional)
Clean containers or jars
Clean equipment helps maintain product quality, especially if the whipped soap is intended for gifting or sale.
Step 1: Weigh and Cut the Soap Base
Accurate weighing is the foundation of How to Make Whipped Soap successfully. Decide how much soap you want to make and weigh out your chosen soap base using digital scales.
Once weighed, cut the soap base into small, even cubes. This step is crucial — smaller pieces whip faster, more evenly, and place less strain on your mixer.
Step 2: Whip the Soap Base
Place the cubed soap base into your mixing bowl. Begin whipping on a low to medium speed.
At first, the base will appear crumbly and stiff. This is normal. Continue whipping patiently — over several minutes, the soap will soften and start to smooth out.
As air is incorporated, the mixture will begin to resemble thick whipped cream. This transformation is one of the most satisfying parts of learning How to Make Whipped Soap, and it’s a sign you’re on the right track.
Step 3: Prepare Fragrance, Colour, and Additives
While the soap base is whipping, prepare any additions you plan to use.
Fragrance oils:
Use according to the fragrance’s IFRA certificate. Typical usage is up to 3% of the base weight, provided this is within the limits set out in the fragrance’s IFRA certificate for the correct product category.
Example: If Your Soap Base Weighs 100 g
1% fragrance = 1 g
2% fragrance = 2 g
3% fragrance (maximum) = 3 g
Shop Premium, Professional-Grade Fragrance Oils
Colourants:
Micas, pigments, or water-soluble dyes can be used. Although up to 3% is technically possible, this is quite high — colour testing is strongly recommended.Additives:
Additives such as clays or gentle exfoliants can be used at up to 1% each.
For best results:
Pre-mix mica or pigment powders with a small amount of isopropyl alcohol to help them disperse evenly.
Pre-mix water-soluble dyes with a very small amount of boiling water.
Preparation at this stage ensures smooth incorporation later — an often overlooked detail in How to Make Whipped Soap.
Isopropyl Alcohol
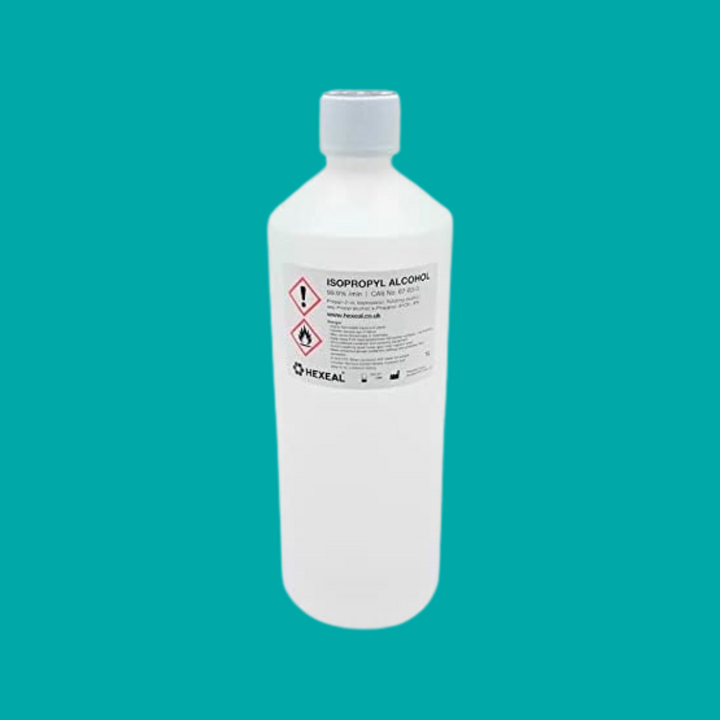
£7.99
A versatile essential for crafting and soap making. ISO can be used to mix with mica powders to create vibrant paints. Simply combine mica powder with a small amount of ISO to form a smooth, paint-like consistency. Use a fine brush… read more
Step 4: Add Fragrance, Colour, and Additives
Once your soap base has reached a whipped cream–like texture, it’s time to add your fragrance, colour, and additives.
Add the fragrance oil first, followed by colour and additives if using. If you plan to make multi-coloured whipped soap, add only the fragrance and additives at this stage and leave the colour out for now.
Mix gently at first, then increase speed slightly until everything is fully incorporated.
Step 5: Whip Until Light and Fluffy
Continue whipping the soap for several more minutes. You’ll notice the texture becoming lighter, smoother, and noticeably more voluminous.
A good indicator of success when mastering How to Make Whipped Soap is volume — the mixture should be roughly double its original size and able to hold soft peaks without collapsing.
Avoid over-whipping, as this can make the soap unstable and overly airy.
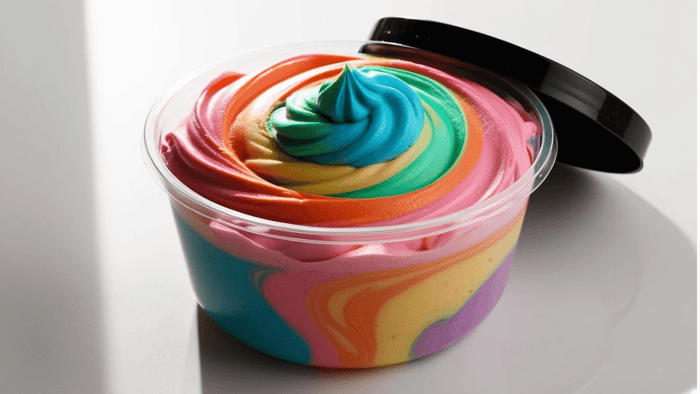
Step 6: Colour Splitting for Multi-Coloured Designs (Optional)
If creating a multi-coloured whipped soap, divide the whipped base evenly into separate bowls.
Add your prepared colourants to each portion and whip briefly until fully combined. Work efficiently to preserve the fluffy texture.
This step adds visual appeal and is particularly popular for gifting or selling whipped soap products.
Step 7: Pipe or Spoon Into Containers
Transfer the finished whipped soap into a piping bag fitted with a large nozzle, or spoon it directly into your containers.
Piping creates a polished, professional finish, while spooning offers a more rustic, handmade look. Both methods work well and are purely a design choice.
Once filled, lightly tap containers on the surface to release any large air pockets and smooth if needed.
Setting, Storage, and Shelf Life
Allow your whipped soap to rest at room temperature for several hours before sealing. While it will remain soft and scoopable, it will stabilise slightly as it settles.
Store in a cool, dry place away from direct sunlight. Proper storage is an essential final step in How to Make Whipped Soap, particularly for maintaining texture and fragrance over time.
Gifting and Selling Considerations
If you plan to gift or sell whipped soap:
Follow IFRA guidelines for fragrance usage
Obtain a CPSR (Cosmetic Product Safety Report)
Use compliant labelling, including allergens and ingredient listings
Even though melt and pour bases are pre-saponified, regulatory compliance is still required for responsible selling.
Final Thoughts
Learning How to Make Whipped Soap is a rewarding process that combines creativity with technique. By choosing the right opaque, whippable melt and pour base — whether OPC, shea butter, goat’s milk, aloe vera, or suspending base — and following a careful whipping method, you can achieve consistently beautiful results.
Once you’re confident with the basics of How to Make Whipped Soap, you can begin experimenting with fragrances, colours, and textures to make products that are uniquely yours.
Disclaimer
This blog is intended for educational and informational purposes only. The instructions provided are based on safe practices for making whipped soap using pre-made melt and pour bases. Please note:
Always follow the IFRA guidelines for fragrance oil usage and ensure any additives are skin-safe.
Melt and pour soap bases have already undergone saponification, but careful handling and hygiene are essential.
This guide is not a substitute for professional training in cosmetic formulation or regulatory compliance.
If you plan to sell your whipped soap products, you are responsible for obtaining a Cosmetic Product Safety Report (CPSR), complying with relevant regulations, and using proper labelling.
Individual results may vary. Use at your own risk, and discontinue use if irritation occurs.
By following this guide, you acknowledge that House of Scent is not liable for any adverse effects, injuries, or losses that may result from the use of this tutorial.
FAQs
Can I make whipped soap with any melt and pour soap base?
No, not all soap bases are suitable. Only opaque melt and pour bases—such as Opaque Crystal (OPC), shea butter, goat’s milk, aloe vera, or suspending bases—whip properly. Transparent or clear bases are too elastic and will not hold air, so they won’t achieve the fluffy, whipped texture.
Can I sell whipped soap I make at home?
Yes, but you must follow safety and regulatory guidelines. Even though melt and pour bases are pre-saponified, you need a Cosmetic Product Safety Report (CPSR) and compliant labeling, including ingredients and allergens. Always follow IFRA usage limits for fragrances, and ensure your product is safe for skin before selling and/or gifting.