
Table of Contents
Soap Making Basics: Hot Process, Cold Process & Melt & Pour
Soap making is a delightful mix of science, creativity, and a touch of magic. From colourful, swirly bars to rustic, fragrant creations, making your own soap is both satisfying and surprisingly relaxing. Whether you’re a beginner looking for a fun craft project or an aspiring artisan, understanding the main methods — cold process, hot process, and melt & pour — is the key to success. Let’s dive in!
What Soap Making Really Means
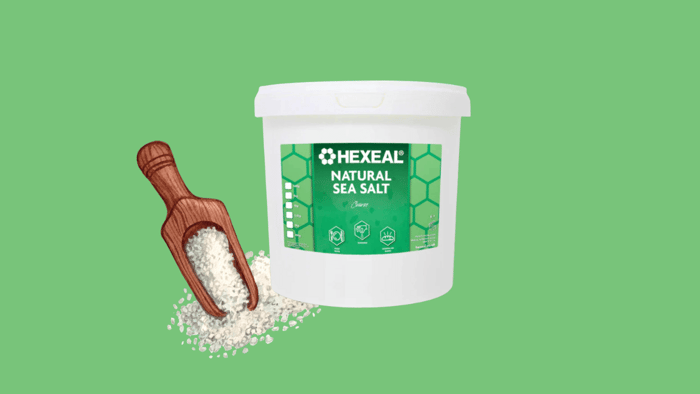
At its simplest, soap making is combining oils or fats with a caustic substance to produce something that cleanses and nourishes your skin. In traditional methods, this involves a chemical reaction called saponification, where lye (sodium hydroxide) interacts with oils to form soap and natural glycerin. Modern approaches, like melt & pour, simplify the process by giving you a ready-made soap base to play with.
But soap making isn’t just about functionality. It’s about experimenting with colours, fragrances, textures, and even hidden surprises like tiny toys in kids’ soaps. Think of it as edible art, minus the calories — but entirely skin-friendly!
Cold Process Soap Making
Cold process is the classic soap making method and is perfect for those who like to control every little detail. Here, oils are mixed with a carefully measured lye solution at room temperature. After mixing until you reach “trace” (a slightly thick pudding-like consistency), the soap is poured into moulds to cure.
Why You’ll Love It:
Full Customisation: You decide everything — from oils and butters to the fragrance strength.
Long-Lasting Bars: With proper curing, these soaps can last months and produce rich, creamy lather.
Natural Moisture: Glycerin remains in the soap, leaving skin feeling soft and pampered.
What to Watch Out For:
Patience Required: Curing can take 4–6 weeks. Perfect time to bake cookies, binge a show, or plan your next batch!
Lye Safety: Always wear gloves, goggles, and work in a ventilated area. Think of it like wearing your superhero armour while creating magic.
Skill Practice: Achieving trace and mixing at the right temperature may take a few tries, but don’t worry — even “oops” batches are still usable (and teach you something).
Cold process soap making is ideal for those who enjoy science, precision, and the thrill of making something truly their own.
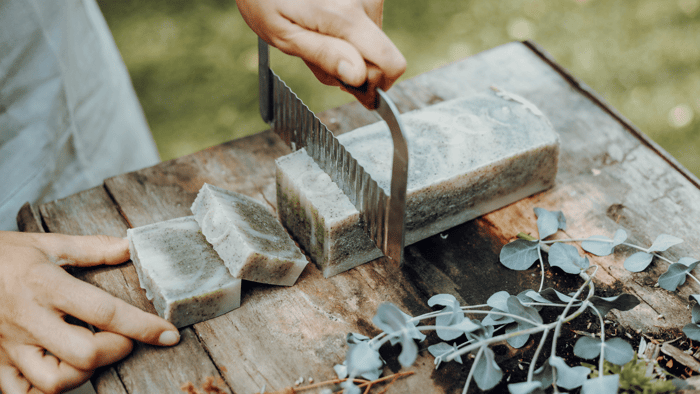
Hot Process Soap Making
Hot process soap making is a slightly faster, hands-on approach. The ingredients are heated — usually in a slow cooker — which accelerates saponification. The soap becomes thick, doughy, and ready to be moulded faster than cold process.
Perks of Hot Process:
Quick Results: Soap can be cut and used shortly after cooling, sometimes within a day.
Rustic Charm: The dough-like texture gives a lovely handmade, artisan look.
Long-Lasting: Just like cold process, hot process bars retain natural glycerin.
A Few Things to Note:
Texture: Thick soap dough is harder to swirl or layer for intricate designs. But if you love rustic bars with character, this is perfect!
Equipment Needed: A slow cooker or heat source is required.
Hot process is excellent for makers who like seeing results fast without losing the creative fun. Bonus: you can even try pressing herbs, flowers, or textured patterns into your bars for added flair.
Melt & Pour Soap Making
If you’re new to soap making or want instant gratification, melt & pour is the method for you. Here, a pre-made soap base has already been saponified. All you do is melt it, add colours, fragrance oils, or fun additives, and pour into moulds.
Why Melt & Pour Rocks:
Super Safe: No lye handling — great for beginners or kids’ craft sessions.
Quick Results: Bars can be ready to use the same day.
Endless Creativity: Layers, embeds, swirls, glitter, toys — the only limit is your imagination.
Things to Keep in Mind:
Base Control: You can’t change the main formula, only add extras.
Quality Matters: Some bases contain synthetic ingredients. Choose high-quality bases for a more natural feel.
Melt & pour is perfect for anyone looking for a fun, fast, and creative soap making experience without the fuss of lye.
Comparing the Three Methods
| Method | Lye Needed | Cure Time | Customisation | Difficulty |
|---|---|---|---|---|
| Cold Process | Yes | 4–6 weeks | Full control | Intermediate |
| Hot Process | Yes | 1–2 days | Medium | Intermediate |
| Melt & Pour | No | Hours | Colours/Additives only | Beginner |
All three methods have their advantages, and many soap makers enjoy experimenting with more than one. You might start with melt & pour, move to hot process for faster results, and eventually master cold process for fully custom, luxurious bars.
Tips to Make Soap Making Fun & Easy
Play With Colours: Use natural clays, mica powders, or your favourite pigments.
Fragrance Fun: Explore an extensive range of fragrance oils and find your signature scent.
Textures & Add-ins: Oats, dried flowers, or coffee grounds add visual interest and gentle exfoliation.
Record Your Experiments: Keep notes on oils, colours, fragrances, and temperatures. You’ll thank yourself when recreating a favourite batch.
Safety First: Gloves, goggles, and ventilation are non-negotiable when handling lye.
Making soaps doesn’t have to be intimidating — it’s about experimenting and enjoying the process. Even “mistakes” can turn into beautiful rustic soaps or clever DIY gifts.
Fun DIY Soap Ideas
Layered Melt & Pour Soap: Create rainbow layers or alternating colours for a fun effect.
Herbal Cold Process Soap: Add dried lavender, rosemary, or chamomile for exfoliation and scent.
Rustic Hot Process Soap: Press leaves or herbs for natural patterns.
Gift Sets: Mix bars from all three methods to create a unique handmade gift collection.
The beauty of making soaps is the flexibility to mix, match, and invent your own combinations.
Conclusion
Soap making is more than a craft; it’s a blend of science, art, and a little bit of magic. Whether you prefer the slow, controlled process of cold process, the rustic charm of hot process, or the playful creativity of melt & pour, there’s a method for everyone.
Experimenting with ingredients, colours, fragrances, and textures keeps the hobby exciting. This can be a relaxing self-care ritual, a way to create personalised gifts, or the start of a small business.
Important Note: When adding fragrance oils to soaps, always check IFRA guidelines to ensure safe usage levels and compliance with safety standards.
Disclaimer
This blog is intended for educational and informational purposes only. The content relating to soap making methods, ingredients, and techniques is provided as general guidance and does not constitute professional, chemical, or regulatory advice.
Always conduct proper research, follow manufacturer instructions, use accurate measurements, and observe all safety precautions when handling lye, fragrance oils, or other materials. Ensure compliance with local laws, labelling requirements, and safety standards if producing or selling soap products.
House of Scent accept no liability for any loss, damage, or injury resulting from the use or misuse of the information provided in this article.