
Table of Contents
- Why Burn Testing Is Essential
- Understanding the Standard Burn Test Method
- Preparing Your Candle for Testing
- Conducting a Proper Burn Test
- Assessing Flame Behaviour
- Monitoring Container Temperature
- Evaluating Scent Performance
- Keeping Detailed Test Records
- Troubleshooting Common Issues
- Testing Different Combinations
- Making Confident Wick Decisions
- Building Professional Standards
- Browse Fragrance Oils & Waxes
- Final Thoughts
- FAQs
Learning How to Burn Test Candles properly is one of the most important steps in becoming a confident and responsible candle maker. Whether you create candles for personal enjoyment, thoughtful gifts, or a growing business, understanding How to Burn Test Candles helps you ensure safety, quality, and consistency in every product you release. To support you in this process, we've also included a free printable burn test sheet that you can download and use to track your results with ease.
In this detailed guide, you’ll learn everything you need to know about professional container candle testing. From preparation and burn cycles to safety checks and record keeping, this blog will walk you through best practices so you can master How to Burn Test Candles like a true professional.
Download Free Printable Burn Test Sheet
Why Burn Testing Is Essential
Before diving deeper into the process, it is important to understand why learning How to Burn Test is such a vital part of candle making.
Every candle is influenced by multiple factors: wax type, fragrance load, wick size, container shape, colour, and even room conditions. A small change in any of these can dramatically affect how a candle performs. Without proper testing, you risk creating candles that tunnel, overheat, smoke excessively, or fail to burn evenly.
Burn testing allows you to:
Confirm your candles are safe to use
Prevent cracked containers and overheating
Achieve consistent melt pools
Improve scent throw
Meet insurance and legal requirements
For professional makers, documented testing is often required by insurers. This makes learning How to Burn Test not just good practice, but an essential business responsibility.
Understanding the Standard Burn Test Method
When learning How to Burn Test , consistency is one of the most important principles. A standard test burn involves multiple burn cycles of approximately four hours each, repeated until the candle is finished.
This method helps you understand how your candle behaves throughout its entire lifespan — from the first light to the final burn at the bottom of the container.
Key Performance Goals
During testing, you should aim for:
A centred or evenly spaced wick
A stable and controlled flame
A balanced melt pool
Minimal soot and residue
Safe vessel temperatures
Remember, perfection rarely happens on the first test. Learning How to Burn Test is about observing, adjusting, and improving over time.
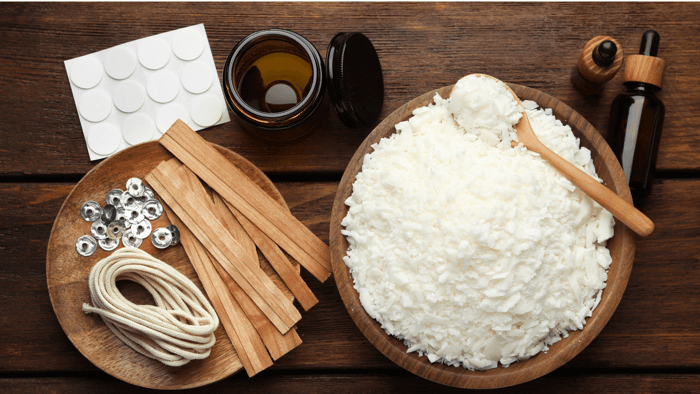
Preparing Your Candle for Testing
Proper preparation plays a major role in successful burn testing.
Allow Adequate Cure Time
Before you begin testing, ensure your candle has fully cured. Most container candles require between 7 and 14 days, depending on the wax used. Testing too early can produce misleading results.
Choose a Suitable Location
Place your candle on a flat, heat-resistant surface in a draught-free area. Keep it away from pets, children, and flammable objects. Burn testing should always be supervised.
Trim the Wick
Trim the wick to around ¼ inch before each burn. This helps maintain flame control and reduces soot formation.
Good preparation supports accurate results and strengthens your understanding of How to Burn Test effectively.
Conducting a Proper Burn Test
Now let’s look at the step-by-step process.
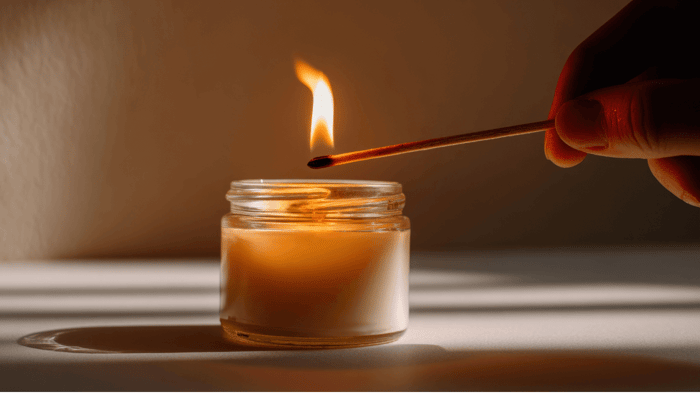
Step 1: Light and Time the Burn
Light the candle and allow it to burn for four hours. Use a timer to remain consistent. Avoid moving the candle while it is burning, as this may affect airflow and heat distribution.
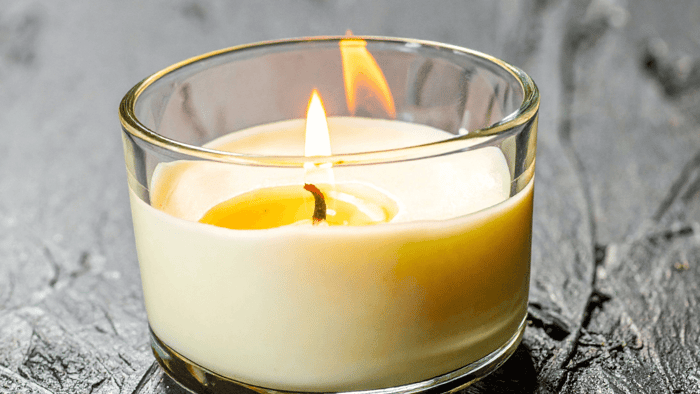
Step 2: Observe the Melt Pool
After four hours, examine the melt pool carefully:
It should expand at roughly one inch per hour
It should reach close to the container edge
Depth should be around ¼ to ½ inch
On the first burn, a slight hang-up of unmelted wax is normal. As the candle burns lower, heat increases and usually resolves this naturally.
Step 3: Extinguish Safely
Use a wick dipper or snuffer to extinguish the flame. Blowing can cause excess smoke and distort your results.
Step 4: Allow Full Cooling
Let the candle cool and reset for at least five hours before relighting. This ensures stable testing conditions.
Repeat this process throughout the candle’s life to fully understand How to Burn Test under different burn stages.
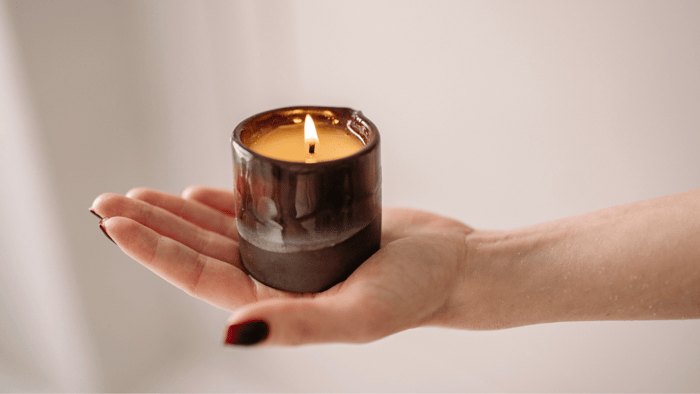
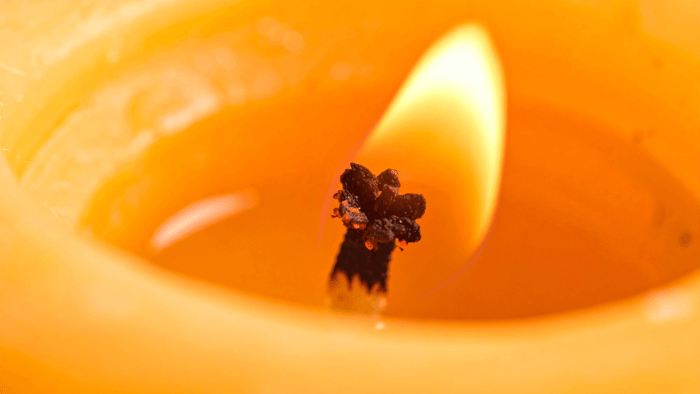
Assessing Flame Behaviour
A key part of mastering How to Burn Test is knowing what a healthy flame looks like.
Ideal Flame Characteristics
Height: Between 1 and 2 inches (never over 3 inches)
Movement: Steady and calm
Colour: Bright and clean
Smoke: Minimal
Some light smoke when extinguishing is normal. However, constant black smoke indicates an issue that should be addressed.
Mushrooming
Carbon build-up, also known as mushrooming, should remain under 5mm. Excessive mushrooming often suggests an oversized wick.
Monitoring Container Temperature
One of the most important safety aspects of How to Burn Test is monitoring vessel temperature.
Overheating can lead to cracked glass, surface damage, or serious safety risks.
Recommended Limits
Glass containers: Up to 140°F (60°C)
Tin containers: Up to 120°F (49°C)
Using an infrared thermometer allows you to check surface temperatures accurately. Always measure at different burn stages, especially near the end of the candle’s life.
If temperatures exceed safe limits, you may need to reduce wick size or adjust your formulation.
Evaluating Scent Performance
Once burn safety is confirmed, you can focus on fragrance performance.
Testing Hot Throw
Hot throw refers to the scent released while the candle is burning. To assess this properly:
Burn only one candle in the room
Close windows and doors
Allow at least two hours of burn time
The scent should fill the space without becoming overpowering. Fragrance testing is an essential step when learning How to Burn Test professionally.
Keeping Detailed Test Records
Documentation is a hallmark of professional candle makers.
What to Record
Maintain a testing log that includes:
Date and duration of each burn
Melt pool measurements
Flame height
Container temperature
Wick condition
Presence of soot
Scent strength
Wax weight before and after burns
Weighing your candle helps calculate burn rate and estimate total burn time. Accurate records make it easier to refine your methods and improve future batches.
Note: Burn Rate = (Start Weight − End Weight) ÷ Total Burn Time
Troubleshooting Common Issues
Understanding How to Burn Test also means knowing how to correct problems.
Tunnelling
If wax remains around the edges, the wick may be too small. Consider moving up one size or switching wick types.
Overheating
Excessive heat suggests the wick is too large. Downsize immediately to improve safety.
Wick Drowning
A struggling flame may indicate underwicking. Try a slightly larger wick or reduce fragrance load.
Sooting
Persistent soot often results from oversized wicks or high fragrance percentages.
Testing Different Combinations
Every variation of vessel, wax, wick, fragrance, colour, and embed must be tested individually.
For example:
Changing fragrance oils can affect flame behaviour
Adding mica or embeds alters heat flow
Different container shapes influence airflow
Never assume one test applies to all designs. True mastery of How to Burn Test comes from thorough and repeated experimentation.
Making Confident Wick Decisions
Avoid finalising wick choices after just one or two burns. Many experienced makers wait until at least the fourth burn cycle before deciding.
Early burns may appear underwicked, but performance often improves as heat builds. Patience is essential when learning How to Burn Test correctly.
Building Professional Standards
Consistent testing builds trust, protects your customers, and strengthens your brand reputation.
When you fully understand How to Burn Test, you can:
Launch products with confidence
Reduce safety risks
Improve customer satisfaction
Meet regulatory and insurance standards
Professional testing separates casual hobbyists from serious candle businesses.
Browse Fragrance Oils & Waxes
Final Thoughts
Mastering How to Burn Test takes time, patience, and careful observation. It is not about rushing products to market, but about creating safe, reliable, and beautifully performing candles.
By following structured burn cycles, monitoring flame behaviour, measuring container temperatures, evaluating scent throw, and keeping thorough records, you will steadily refine your craft.
Every test brings you closer to excellence. With dedication and consistent practice, you will truly know how to burn test candle containers like a pro.
FAQs
Why is learning how to burn test candles important?
Learning how to burn test candles ensures safety, quality, and consistency. Proper testing helps prevent issues like tunneling, overheating, soot, and uneven melt pools. For professional makers, it’s also essential for meeting insurance and legal requirements while building trust with customers.
How do I conduct a proper burn test for container candles?
A proper burn test involves multiple four-hour burn cycles, observing melt pools, flame behavior, and container temperature. Steps include trimming the wick to ¼ inch, burning in a draft-free area, monitoring flame height (1–2 inches), and recording observations like soot, wax melt, and scent throw. Repeating tests ensures accurate results across a candle’s lifespan.
What should I record during a burn test?
Maintaining detailed test records is crucial for professional candle making. Record the date and duration of burns, melt pool size, flame height, container temperature, wick condition, soot presence, scent strength, and wax weight before and after burns. These logs help refine wick choices, improve candle performance, and ensure safety and consistency.